
Items
This page includes instructions on what an item is, how Omeka S manages added media, and why items are significant to the operation of creating an Omeka S digital exhibit.
← To the left is a YouTube video explaining how to create an item. In addition to the YouTube video, this page will explain what relationship items have with pages.
- - - - - - - - - - - - - - -
Items attach neccessary data about the material that bases a viewers reality of the visual or auditory media through an item's metadata.
A page is the front facing part of the Omeka S platform. Items supply the pages with visual or auditory media. Without items, a page is only text.
On the item sets page is a step-by-step instruction on how to quickly add an item onto a page by using an item set as a filter. The images you could click on in the item sets page on the "item carousel" are examples of how items add a visual aid to the exhibit. Once you select one of the displayed images, its metadata appears. Like the plaques under objects displayed in a museum, an item's metadata bases a viewers reality of the presented visual or auditory media.
How To Add Alt-Text To An Item's Media


Adding alt-text improves the item's accessibility by describing what the image is to those who are visually impaired.
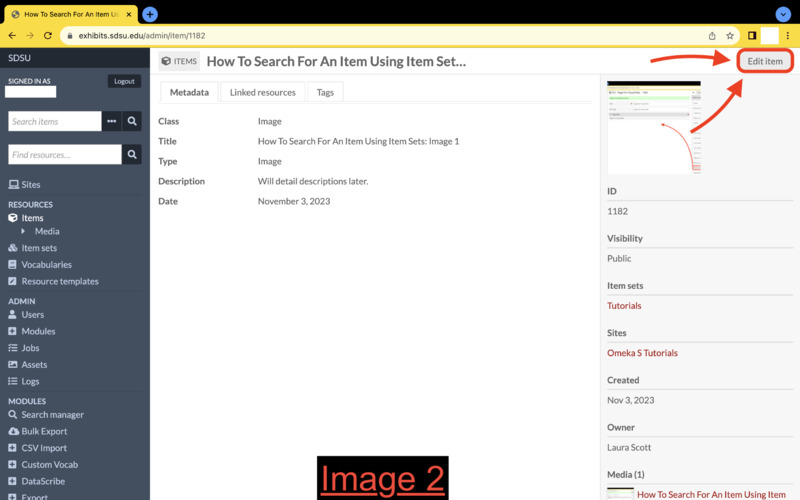
Image 1: Select the item you wish to add alt-text to.
Image 2: Select "edit item."
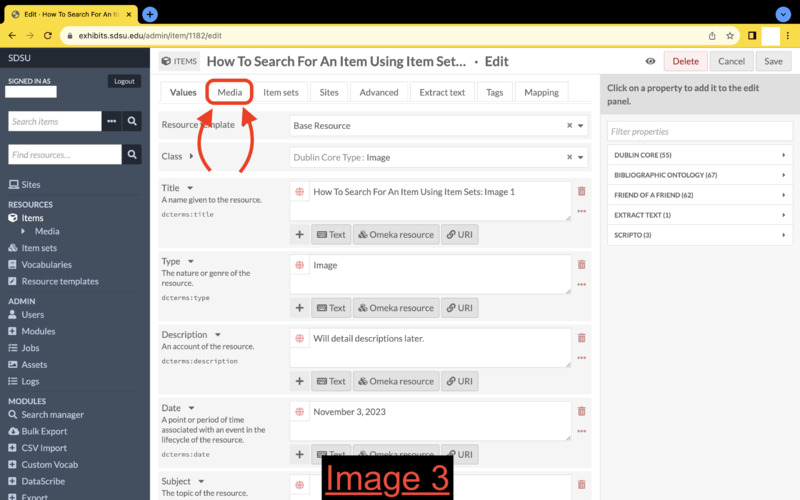
Image 3: Navigate to the "media" tab.
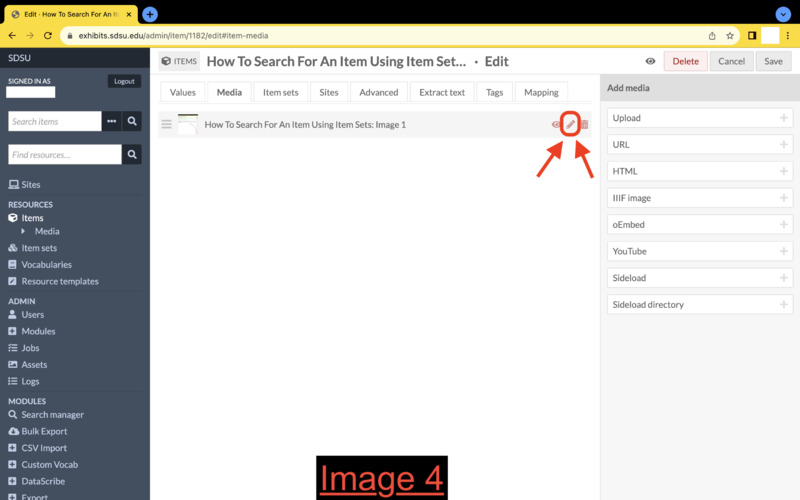
Image 4: Within the "media" tab, click on the pencil icon to the right of the media you wish to edit.
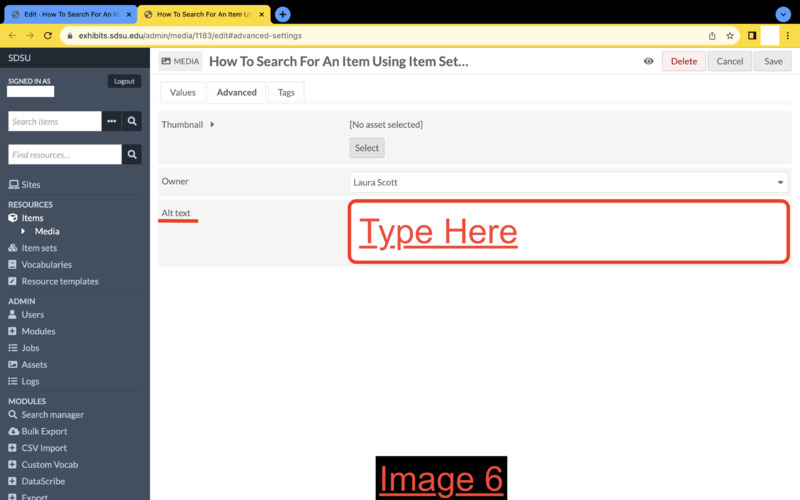
Image 5: An additional tab will extend to your electronic device. Within this new tab you can add any metadata pertaining to the item's media specifically. To add alt-text, navigate to the "advanced" tab within the new tab.
Image 6: Within the media's "advanced" tab you can add alt-text.
Remember to select the save button to record any changes made.
If you wish to learn more about pages visit the following link down below.